Skip to content

Installing windows 7 on nvidia raid controller

tempI have an ECS C51GM-M motherboard and I run two 500GB hard drives in RAID-0 to give me 1TB of fast storage. The problem with this is that when you try to install any form of windows, it doesn’t see any available disk. There are ways around this-

1. When installing XP, you press F8 and then use a floppy (my motherboard doesn’t have a floppy connector). Or you can slipstream the RAID drivers onto the windows XP disk.
2. When installing Vista, you can insert a USB or CD with the drivers on it (this is how I installed last time).
3. With Windows 7, the drivers that I used when installing Vista no longer worked.

Here I am, giving windows one last chance to win me back before I convert everything to linux (or os x!) and its failing miserably. Luckily I figured out a relatively easy fix. It works because Vista and Windows 7 use the same bootloader.

Start with a working Vista machine. In my case I had Vista on a single partition on my 1TB RAID array.
Next, create some space for Windows 7, 16GB is the absolute minimum. Boot off a gparted CD to do this, if you have a large partition like mine, it will take 30 minutes or so to shuffle things around.

Boot into Vista and create a simple volume on your new partition. Now is the part that took me forever to figure out: Run the Windows 7 installer while your still in Vista! I usually never do this but in the case, its the only way. When it reboots, boot from the hard drive and you will see ‘windows 7 installation’ in the bootloader list.

I’m glad this is easy but I’m still curious why didn’t it work when I tried to use the drivers in the installer. And why can’t they bundle the same drivers which I get in any linux distro?

I’m not sure if I feel proud for figuring this out on my own or dumb for not figuring it out sooner.

MicroManage your network with Netdisco

netdisco

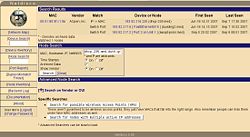
Netdisco is a great network management tool created by our friends at UCSC, it will tell you which devices are plugged into which ports on every network device you have. It keeps track of devices by mac address and IP. It also will automatically create a network map of all your routers and switches (maybe).

Here is how it works (overly simplified):
1. You install netdisco on linux or freeBSD- its open source and requires perl, postres sql database and apache. I’d recommend you cheat and download the prebuilt virtual appliance from http://wokka.org/netdisco/
2. Next you configure all your network devices to ‘talk’ to the server via SNMP. For starters, give only read access and only to the IP of your management server.
3. Tell Netdisco to discover the devices, it will poll them and gather information about which mac address and IPs are connected to which ports on the device (this is called MacSuck) . There is other info too, like hardware model, IOS version, port negotiation & speed, uptime, etc.

netmapNow the difficulty comes in when you try to add devices and they don’t show up correctly. There are two problems.
The first is that CDP (cisco discovery protocol) only works on Cisco devices, so when you look at your network map the links are missing. This can be fixed by modifying /usr/local/netdisco/netdisco-topology.txt
The second is that not all devices are officially supported, check the http://netdisco.org/DeviceMatrix.html for a complete list.

Now if you have a router which is a linux box, it won’t recognize anything off the bat. There is a simple fix but – I did NOT figure this out, my buddy spent a quite tracking it down- its such an easy solution we both feel it should be more easily google-able. He has posted the solution at How to poll a Linux Based Router for NetDisco Basically you configure net-snmp, verify with snmpwalk, then add sysservices 76 to snmpd.conf and restart snmpd.

iPhone 2G unlocked and running 3.0 OS

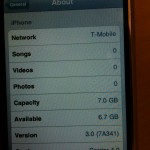
iphone_tmobileEven though the OS just came out, this is actually a very easy mod. I just downloaded the files from http://www.iclarified.com/entry/index.php?enid=4255
You use the Pwnage.app to create a new firmware file (.ipsw) and then restore the file to your phone. Once the firmware has loaded, it will reboot and update the baseband (be patient). Pwnage has come a long way since the release of the iPhone, the GUI is quite nice now. The downloads take about 20 minutes and the upgrade itself will run you another 20 minutes.
To test, throw in a prepaid T-mobile SIM and make a call. If you put an apple account into the App store, you can download apps- but only over wifi; the SIM I was using didn’t allow any data transfer over EDGE, I’m not sure if those are available in the US or not.

Macbook Pro and iPhone 3GS – Christmas in July!

It all started last week, with the unveiling of the new Macbook Pros and iPhone 3GS.keyboard_backlit

Right after the iPhone’s launch I went to buy one from the online apple store, but it appeared I was going to lose any AT&T discounts which I had in place. Instead I waited until the next day and was able to purchase it from the AT&T store. 

The next day I was able to add my phone to a friends developer account and acquire the new 3.0 firmware; it’s nothing huge but there are so many little features, you can tell they’ve really been listening to us! 

Then on Tuesday I saw the Macbook Pro and I fell in love, and fell hard. But I stood my ground, because my white Macbook was only a year old and still had plenty of life in it. By wednesday I had changed my toon, when I found out I could get one (using an EDU discount) for $1100 and get a free iPod touch (via rebate). After tax that brings the total cost to $1000 (after hocking the iPod touch on ebay). Then after unloading my macbook it brings the total upgrade to $500. But that wasn’t the surprising thing; I placed my order on Wednesday at noon and received it Thursday at 10am- and I didn’t select fast shipping, I chose free shipping! So it was a nice surprise to say the least.

macbook_pro_insideRemember the days when you could pull a hard drive out of any mac and throw it in another mac and it would work? Well those days are mostly gone; When I tried to boot off my drive from the Macbook pro it did nothing at first. When I tried again later it did boot, but certain features (like sound) wouldn’t work at all. Luckily I had a 30GB partition already set aside on the drive for this type of scenario, so I loaded a fresh copy of Leopard and used settings transfer wizard which pops up. The majority of my settings tranferred fine, although my VPN software (Shimo) got hosed, probably because it didnt transfer my network adapter settings, which is logical. By the way, the hard drive replacement on the new ones is amazing easy, just don’t lose any of the 12 screws which must be removed.

As for my iPhone, boy is it snappy, they didn’t add the S for slow, thats for sure. So far my favorite brand new apps are Top Gun and Family Guy. I waited 3 hours for activation, all my friends were activated and laughing at me, that makes me a sad panda. Eventually, since my old phone was still working I decided to swap the SIMs- and it just worked.

macbook_iphone

Productivity was at an all-time low today, with people going to the mall to pick up their phones, activating their phones at their desks, or generally milling about and talking about their phones. The question we all ask is why can’t every day be iPhone day?

So far I’m loving both products, my main gripe with the laptop is that the screen doesn’t go to the edge, but non of the apple ones do (yet!). The only thing I’m just noticing now is that the unibody edge is a little sharp, so as I slouch in bed writing this, my wrist develops pretty severe red line across it- I guess I’ll have to work on my posture if I don’t want to look like a suicide victim.

multiple devices on a WGA600N bridge

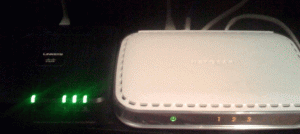
wga600nLinksys describes this devices as a “Wireless Gaming Adapter”, however it can be used in a way similar to a traditional wireless bridge.
In my example, my access point has the IP address 10.18.18.1 and NATs IPs 10.18.18.0/24.

First, there are known issues with the older firmwares and something I’ll call ‘MAC address impersonation’. Without this functioning correctly, you shouldn’t attach a switch. First, upgrade your firmware to the latest, in my case 1.0.5:
Reset your WGA600N to defaults by putting a paperclip into the reset button on the back and waiting for the orange light.
Plug you laptop into the LAN port and give yourself the IP 192.168.1.100, 255.255.255.0
Navigate to http://192.168.1.250 leave username blank, password is admin
Tools->Firmware (upload firmware)
Tools->Admin (change password) 
Basic->Wireless (setup connection to wireless and security)
Basic->Network Settings (give it a new IP in the range of your access point, this won’t be the address of your multiple devices but rather an administrative IP; in my case 10.18.18.250) 

Now you should be running the latest firmware, plug an ethernet cable into the WGA600N and the uplink port on your switch. Plug your client devices into the switch and set them to dhcp (or static in your access point’s IP range, in my case 10.18.18.0/24).

acquiring old cisco IOS

So maybe you have a Cisco CCO account but the IOS image you need to load on your router to replicate your customer’s issue is no longer available. There are still some options left.

If you already know the filename of the image, your half way there. If not, there is a nice list here http://thepiratebay.org/torrent/4409592/Cisco.IOS.Monster.Collection.2008 Once you have the filename, just google it, there’s a decent chance it is on an ftp site somewhere.

If that doesn’t work, you can use the windows program IOS hunter http://www.vitaltech-group.com/IOSHunter.htm , or if you have plenty of time you can download a 20GB torrent called Cisco.IOS.Monster.Collection.2008 which has a ridiculous number of obsolete images.

If you’re security-minded you probably want to be sure the image hasn’t been modified. However I haven’t found any place (other than Cisco) where you can verify your file via an md5 hash. I wish cisco would make a non-CCO page which had the md5 hash for every IOS image ever created, but maybe that would only encourage us.

installing windows 7 RC1

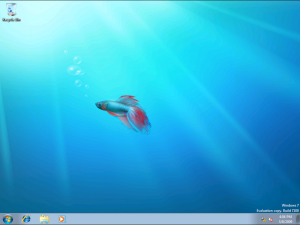
vista_desktop1The first thing I noticed was the change in the boot partition from 200mb to 100mb (interesting but insignificant). In the previous windows7 beta it was 200mb. For formatting/partitioning, quick format is now the standard (yes!).

The next thing I noticed was that a password isn’t required but (if you use one) a password hint is required.

Just like XP SP3, you no longer need to input your serial number during installation; you can skip it and put it in later (nice feature!)

The install takes 15 minutes to install and another 10 to get through the config menus; a total of 25 minutes isn’t bad.

The first thing I notice is when you mouse-over the start button it lights up, cool. Then I go to control panel and there’s no was to switch back to classic view, not cool. This means that millions of techies who knew where everything was will have to relearn this new menu system. The menu system was there in vista but we would always bypass it in favor of classic view. Too bad this is no longer an option, the Vista menu system requires more clicks to get certain things done, since everything is in catagories.

When i go to change my IP settings, there is a shield (indicating a UAC prompt is coming). But the prompt never happens, yah! Looks like they fixed the UAC prompts that constantly plagued vista users. UAC does prompt me when I run setup.exe from a CD, which is good.

Since I’m installing in ESX I install vmware tools; installs with no problem and works great! As with vista I open a command prompt (as elevated user) and do “net user administrator /active:yes” to enable the administrator account. I’ll still need to go into the “Users and Groups” mmc in order to set a password.

So the final verdict on windows 7, so far so good; when I can I’ll do some performance testing to see how it compares to Vista.

why legacy shortcut keys?

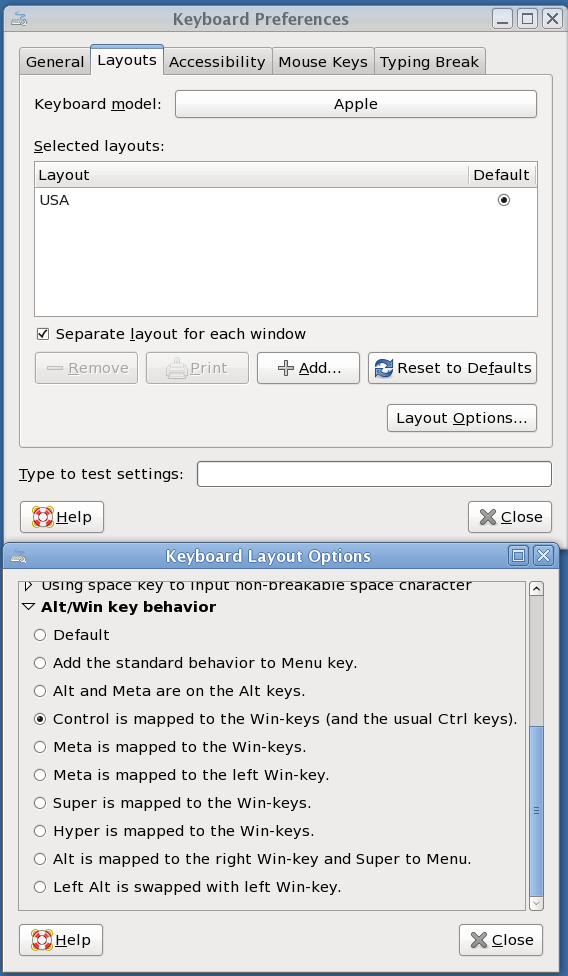
keyboard_prefs1Something that has puzzled me for many years- why was the control key chosen as a primary shortcut key for windows and *nix? Why would you forcibly abuse pinky-fingers around the world? It makes us all slower, less accurate and generally just hurts me.

Apple knows theres no reason for this, which is why their version of the control key (the apple key) is positioned right next to the spacebar.

I’m sure microsoft’s excuse is ‘well its too late to change, everyone is acccustomed to using the control key’. Well this is certainly not true for me. One reason why I love running linux is I can map anything I want to any key.

The specific functionality of using the windows (or apple) key as the control key is available in gnome by going to:
1. System -> Preferences -> Hardware -> keyboard
2. Layouts tab
3. Layout Options…
4. Expand “Alt/Win key behavior”
5. Select the radio button “Control is mapped to the Win-keys (and the usual Ctrl keys).”

For me it works great for a while, but somewhere between 5 and 48 hours of usage it will stop working. I haven’t been able to diagnose it yet, but I did manage to gather enough info to file a bug https://bugs.freedesktop.org/show_bug.cgi?id=21624

DirecTV HR21 dvr storage upgrade to 1tb

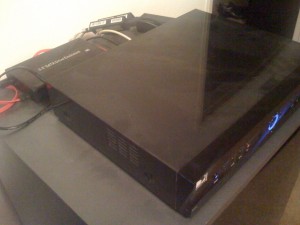
HR21-200 and esata driveI love how companies are doing ‘unsupported features’ now. Here is how it usually happens-

1. The hardware guys spec hardware that has certain capabilities. Some of these capabilities are there because they are simply bundled with the hardware (try buying a motherboard with a CPU socket but no USB slots 😉 Other capabilities are there because the hardware guys want to allow the possibility of extended functionalities whether they take shape or not. This is probably why the eSATA port is included on the direcTV DVRs.

2. In the past, companies would toy with a capability and if it wasn’t going well or there were problems in QA, they would just disable the capability. Nowadays there’s a new option, you leave the capability available but call it ‘unsupported’.

This gives them the opportunity to have their cake and eat it too. The techies who will only buy a DVR which is upgradable will buy it so they don’t lose customers there. Yet there’s no support overhead because they don’t have to ‘support’ it whatsoever.

Then theres people like me- we’re more likely to buy something hackable and the more difficult the hack the more interested we are (I spent hours and hours with my WRT54G linksys routers).

The only thing they lose is the ability to sell eSATA drives to their customers; why they decided this isn’t worth it is hard to guess; but there are several obvious reasons.

1. They can’t make much profit on drives because people can just buy any drive and use it. A software update could prevent users from using any drive not made by DirecTV but then they would lose people like me, who hate being forced into buying any hardware from a single vendor.

2. It is difficult to gauge how much of an increase in support costs this would cost but any increase wouldn’t be able to be offset because of problem#1. 

3. Perhaps in QA they realized that functionality or environment is unreliable. For example, if you place your eSATA drive at the back of your DVR, is it more likely to overheat? I know mine is very sensitive to heat, it used to periodically become unresponsive when I was using it inside my stereo cabinet.

By the way, my favorite unsupported feature of all time? SSH on ESXi

On to the hack, if you can even call it that. I have a HR21-200 which I think has a 320GB drive. It has been full as long as I can remember. I wish I had done this upgrade a long time ago. 
It doesn’t work with all drives and enclosures, so be sure to google for someone using your drive. My drive is a Samsung Spinpoint HD103UJ 1TB SATA2 7200rpm 32MB cache. With any drive over 500GB I insist on a 32MB cache; who knows if it makes a difference. I bought it from goharddrive.com, it came with an “iNeo I-NA306UE USB & eSATA Leatherette External Enclosure” for 130 out the door. I gave the enclosure to my girlfriend, since she needed a USB enclosure. The enclosure I’m using the the DVR is an unlabeled Sabrent but it looks like an EC-ESTK, judging from the pictures online. I don’t see anything about supporting 1tb drives, but when I purchased it there was no such thing as a 1TB drive.

Once i setup the drive and plug it into the DVR, I simply turn off the DVR, turn on the eSATA drive, pause for a several seconds, then poweron the DVR. It will recognize the drive, format it and you’ll be set to go. All your settings, recording and scheduled recordings are gone, at least until you reboot with the eSATA drive poweredoff, then all your stuff returns. 

This is impressive, it means that the hardware guys were smart enough to include a hard copy of the operating system on the motherboard itself. This is one of the great things that has come out of the cheapness of solid state memory (like flash or thumb drives). If you opened up board you might find an onboard flash card reader, usb port with a flash drive in it, or simply memory soldered to the board. The later is less likely since it wouldn’t be upgradable.

What did I learn? Next time I will do this hack from day 1, now I’m stucking attempting a migration that is very difficult. I though of cloning the drive but the only way would that might work is with a hardware cloner, and I don’t have access to one of those anymore (they are relatively expensive). I thought of attempting a software clone using something like Acronis but from what I read the drive will basically corrupt the moment you plug it into a PC. I still would love to see someone come up with an upgrade procedure using DD (a unix tool) or Acronis. Since I haven’t found anyone whose tried it yet I suppose I’ll have to try it myself. I’m sure I’ll have plenty of time once my girlfriend leaves to do her summer internship. 

I’m pretty sure that windows will hose the disk the moment I plug it in. I’m thinking if I use linux and disable automount, I might have a shot at mounting it as read only and then taking an image of it. I may be able to just use DD to pipe all the data to a massive file, but who knows if that will work.

going mouseless because of hyper-v

Today I was importing an image into hyper-v, found out some interesting things. You can’t install the integration tools for the client if an old version of integration tools is installed (for example, the image came from MS Virtual Server 2005).

The reason were going mouseless is because Hyper-V doesn’t allow any use of the mouse inside a client unless the integration tools are working.

Until you get the integration tools or RDP working, your mouseless. One (maybe the only) benefit of windows over OS X is that you can do anything with the keyboard, it just requires some creativity.

The image i was working with is pretty well secured. I couldnt the windows key to open the start menu, autorun and dhcp was disabled. So how do I configure RDP? Or how to I run anything without the start menu? Here is where the task manager comes in.

So control-alt-delete allows you to start the task manager. Once you get it open, you can go to Alt-F to open the file menu and select new task. Of course since I’m using vista I cant just run cmd, I need it privileged. So instead I run explorer.exe, navigate to c:\windows\system32\cmd.exe and select it (use the space bar for selecting). Then shift-F10 opens the right-click menu and I can select run as administrator. From there I can configure my IP address using the same commands we used in windows 2008 core (who thought those would be useful?) Then to enable firewall exceptions I go back to explorer.exe (alt-tab is your friend here). Then open gpedit as administrator and modify your firewall exceptions in Computer Profile > Administrative Templates > Network > Network Connections > Windows Firewall > Standard Profile:
Do not allow Exceptions: Disabled
Allow Remote Administration exception: Enabled
Allow File and Printer sharing exception: Enabled
Allow Remote Desktop exception: Enabled
(use * for the scope to be fully insecure!)

If you don’t know how firewall scopes work, this is a pet peeve of mine (and common interview question!) Basically if you configuring a hole in you firewall, the scope indicates what IP range your allowing that exception for. For example, if you create a remote desktop exception with the scope of 10.18.18.0/255.255.255.0 and someone tries to remote desktop from 10.18.19.50 then they wont even see the port open, because they are outside the scope.

Anyway, I digress. Get your control panels open using these commands here http://support.microsoft.com/kb/192806 in order to complete your configuration.

Oh Acrobat, why oh why?

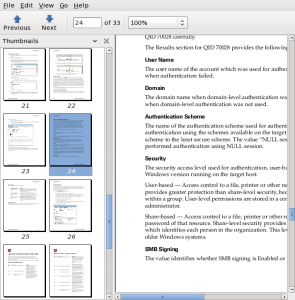
evince using popplarI’ve never had anything against Adobe products. There is one exception, Acrobat Reader.
There are many reasons why their PDF standard is excellent. Features such as platform interoperability and OCR integration have made it a gold standard. The odd thing is, why can’t they make Reader a reasonable program? It will lock up and crash without hesitation, or bring your system to it’s knees and make it beg for resources. It has been mostly this way for the last three versions (7,8,9).

There was a time when we could say  that these problems were due to difficulties with the PDF format itself. However, lets look at these three programs:

1. Apple OS X preview. This application loads or creates PDF very quickly, rarely crashes and has all the features that 99% of users need.
2. Sumatra (only on windows). This gem is a real godsend if you need read PDFs on windows and hate reader as much as I do. It only reads PDFs but it does it with ease. Available from http://blog.kowalczyk.info/software/sumatrapdf/index.html
3. Evice (linux). This program works great on linux, it comes standard with most distros that include gnome.

So what’s the story here? Who knows why Reader is so bad, but I’d love to see Adobe step up and release something like Sumatra (call it Acrobat Reader Lite or Express if you want).

I suppose simply allowing all the alternatives is good enough for me.

A hyper-V day

Hyper-V is Microsoft’s attempt to reclaim some virtual machine marketshare, after being spanked by VMWare for years now. Virtual PC 2005 was their last attempt and was comparable to VMWare Workstation or Server, but couldn’t hold a flame to VMWare ESX.

Hyper-V only runs on 2008 or Vista, it is basically ESX with less features and a more ‘windows’ feel.

In my case I setup the server on a 2008 core installation. But first I verified my processor was AMD-V capable (a BIOS upgrade to my Dell SC1435 was necessary to enable the capability). Then I loaded up the server with 8GB of memory, I love how cheap memory is now.

Once I had the server setup using these typical archaic dos commands (dos should have been improved before core was ever conceived):

Setup Intefaces:
netsh interface ipv4 show interfaces
netsh interface ipv4 set address name=<number from previous command> source=static address=10.18.18.118 mask=255.255.255.0 gateway 10.18.18.1
netsh interface ipv4 add dnsserver name=”” address=10.18.18.1 index=1
netdom rename computer %computername% /NewName: MyHyperVMachine
Enable Remote Desktop:
Cscript %WinDir%\System32\Scregedit.wsf /ar 0
Cscript %WinDir%\System32\Scregedit.wsf /cs 0
Turn off Firewall:
netsh firewall set opmode mode=disable
Join to my domain:
netdom join %computername% /domain:subdomain.infinitedisorder.com /userd:administrator /passwordd:*
Install hyperV service:
bcdedit /set hypervisorlaunchtype auto
start /w ocsetup Microsoft-Hyper-V

Then I installed the update (this was required to get it working):
wusa Windows6.0-KB950050-x64.msu

To setup the remote management piece, you can either read the 5 part series here http://blogs.technet.com/jhoward/archive/2008/03/28/part-1-hyper-v-remote-management-you-do-not-have-the-requested-permission-to-complete-this-task-contact-the-administrator-of-the-authorization-policy-for-the-computer-computername.aspx or just use the script he wrote, its pretty nifty http://blogs.technet.com/jhoward/archive/2008/11/14/configure-hyper-v-remote-management-in-seconds.aspx

So we now have a server running 2008 core and hyper-V. Now to setup your client. The only clients capable of managing hyper-v are 2008 or Vista SP1. I downloaded the remote management tool from http://www.microsoft.com/downloads/details.aspx?FamilyId=BF909242-2125-4D06-A968-C8A3D75FF2AA&displaylang=en and installed on my vista target.

The caveat here is that your client and server must be on the same domain and your user must have permissions on both. Use this user to log into the client, open the MMC snapin and add your server.
Once your server is added, I’d recommend you change where the configs and machines are located. The machines folder will just have a large .vhd files, the config directory will have a bunch of crap.

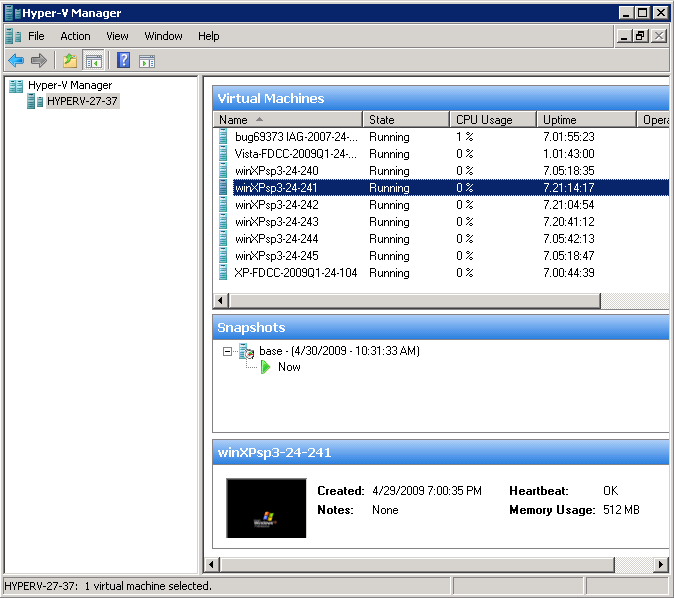
hyper-v managerNow on to the numerous limitations:
1. Unless you’re running the mmc on the server (which is impossible here since I installed it on core) you can’t mount ISO’s from a networked file store. You actually can if your file server is running windows and  you delegate permissions has described here http://blogs.technet.com/josebda/archive/2008/06/27/using-constrained-delegation-to-remotely-manage-a-server-running-hyper-v-that-uses-cifs-smb-file-shares.aspx but in my case I refuse to run a windows file store. If anyone knows how to get this piece working with a linux file server let me know, I think it may be simply impossible.
2. Major mice problem- in ESX, support OS just means VMWare tools wont install which means your mouse will be choppy. In Hyper-V, a non-supported OS means NO mouse whatsoever. And their supported OS list is very short, its windows and SuSE!?! The list is maintained here http://www.microsoft.com/windowsserver2008/en/us/hyperv-supported-guest-os.aspx
3. Two people can’t view the same console at the same time, this is minor but when your collaborating it gets annoying.
4. No integrated cloning ability. This is just retarded. You can import/export but then you’ll have to fix the file structure because it is the opposite of the server’s file structure, (all your config in the same folder as the .vhd). So the easy way is to shutdown your guest OS, copy the .vhd, create a new machine and point it at your newly copied file. Not difficult but for something this simple, why not integrate it? There must be some business reason for this, theres certainly no technology hurdle.
5. Connecting to the virtual machine console takes a few seconds, this might not be a problem initially but when you spend alot of time with it, it gets annoying.
6. Snapshots automatically snapshot memory unless you shutdown the machine prior (waste of disk space, give me the option instead). Snapshots are automatically named based on the date, then I have to rename it after creation.
7. Forcing me to run Vista to manage it is just mean, although this may be technology related moreso then pushing us into vista, not sure.

Of course this product is free (if you own 2008) so lets also mention the limitations of free ESXi:
1. With the client you can only connect to one server at at time. This can be overcome by purchasing licenses. Hyper-V doesn’t have this limitation.
2. Can’t directly clone, again licensing.
3. No local console, but actually u can enable ssh very easily, its just ‘unsupported’.

Overall, ESX is a far more refined product. I’d say Hyper-V will get better, but MS has more of a tendency to feature bloat then anything else.