Skip to content

Review of CrossOver 324K UHD 32″ 3840×2160 60Hz 4k Display

I couldn’t find a review for this screen so I figured I’d post one now that I’ve purchased it.
I purchased this on ebay for ~$500, it is also available from newegg.
Pros:
Great picture and resolution
No bad pixels
Stand can angle up or down
Even though it ships from Korea, I bought from ‘dream-seller’ and got it in 3 business days.

Cons:
It crashes about once a day and I have to power-cycle it, the OS still thinks its connected so I don’t think its OS related.
Buttons on the front don’t do anything (there are corresponding buttons on the back OR the remote works)
The customization menus are in Korean, I can’t read them (I found a fix for this, scroll to the bottom menu and select the first item, you can switch it to english)
Stand doesn’t go up or down
If you can’t get 60hz on your macbook, you may need to close the lid (I suppose this would be a big con for some people, I run mine closed anyway).

Overall I’m very pleased with this monitor at this price. I think 32″ is a great size for a 4k or UHD display; this is presuming you are sitting relatively close to it. I tried using MATE but without the scaling it wasn’t usable. It works great with Unity or OSX; haven’t tried windows.

Note: I also purchased a GeForce GTX 750 Ti, I’m powering the 4k with the display port (60hz) and 3 other 1080p monitors over hdmi and DVI. Works great for videos or productivity, I haven’t tested any games yet.
221944926755_2

fix for ubuntu unity notify-osd 14.04 volume OSD

When having MATE and Unity both installed, a conflict can occur with the notifications daemon. The MATE daemon will prevent the unity daemon from starting.

The main indicator of this problem (when logged into Unity):
pgrep notify-osd returns no process ID
volume OSD (on screen display) doesn’t work
add-ons like notifyosdconf do nothing
OSD theme doesn’t match unity theme

The quick fix:
sudo apt-get remove mate-notification-daemon
pkill notify-osd

Test:
notify-send test

fix vmware player error

Without getting into why your seeing this error, here it is:
cp: cannot stat ‘/usr/lib/vmware/lib/libvmwarebase.so.0/libvmwarebase.so.0’: No such file or directory

Quick fix:
sudo ln -s /usr/lib/vmware/lib/libvmwarebase.so /usr/lib/vmware/lib/libvmwarebase.so.0
sudo ln -s /usr/lib/vmware/lib/libvmwarebase.so/libvmwarebase.so /usr/lib/vmware/lib/libvmwarebase.so/libvmwarebase.so.0

create launchers for webapps like evernote in mate panel

Tested on ubuntu 12.04 mate, this was amazingly easy once I figured it out.

Browse to your webapp in chrome, like https://www.evernote.com/
More Tools -> Add to desktop (check box for open as window)
Go to your webapps dashboard chrome://apps/
Right click on the evernote icon and “create shortcuts”. Check box for “Application Menu”

Go to your panel and rightclick -> add-to-panel -> application launcher
Search for your webapp (in this case evernote).

If your launcher didn’t get a proper icon, download one from the web and put it in a permanent location (Dropbox/icons).
Right click on the launcher -> properties -> click on icon -> select new icon.

Done and Done
Screenshot

dashing.io quick install ubuntu 12.04

sudo apt-get install ruby
sudo apt-get install ruby-dev
sudo gem install dashing
sudo gem install bundler
sudo gem install execjs
sudo apt-get install nodejs
dashing new ops_dashboard_project
cd ops_dashboard_project/
dashing start

dashboard should now be running on http://localhost:3030

blocking access to elasticsearch and adding access to elasticsearch plugins

Apache Site:

<IfModule mod_ssl.c>
    <VirtualHost _default_:8443>
        ErrorLog ${APACHE_LOG_DIR}/error.log
        CustomLog ${APACHE_LOG_DIR}/access.log combined

        SSLEngine on
        SSLCertificateFile /etc/ssl/ssls-com-wildcard-2015.crt
        SSLCertificateKeyFile /etc/ssl/ssls-com-wildcard-2015.key

        ProxyRequests Off
        <Location />
        ProxyPass http://127.0.0.1:9200/
        ProxyPassReverse http://127.0.0.1:9200/
        AuthType Basic
        AuthName "KOPF Web Site: Login with hf-it-ops email address"
        AuthUserFile "/etc/nginx/htpasswd.users"
        Require valid-user
        RewriteEngine on
        RewriteRule ^/.+/(.*) http://127.0.0.1:9200/$1 [P]
        </Location>
    </VirtualHost>
</IfModule>

Setup iptables:
iptables -A INPUT -p tcp --dport 9200 -s 10.0.0.0/8 -j ACCEPT
iptables -A INPUT -p tcp --dport 9200 -s 127.0.0.1 -j ACCEPT
iptables -A INPUT -p tcp --dport 9200 -j REJECT

Save iptables:
sudo apt-get install iptables-persistent
sudo iptables-save
sudo service iptables-persistent start
sudo update-rc.d iptables-persistent enable

filebeat and logstash 2.0 with log4j setup

logstash config:

input {
#  tcp {
#    port => 5000
#    type => syslog
#  }
#  udp {
#    port => 5000
#    type => syslog
#  }
#  lumberjack {
#    port => 5001
#    type => "logs"
#    ssl_certificate => "/etc/pki/tls/certs/elk-staging.crt"
#    ssl_key => "/etc/pki/tls/private/elk-staging.key"
#  }
  beats {
    port => 5018
    type => "log4j"
    ssl => true
    ssl_certificate => "/etc/pki/tls/certs/elk-staging.crt"
    ssl_key => "/etc/pki/tls/private/elk-staging.key"
    codec => multiline {
      # Grok pattern names are valid! :)
      pattern => "^%{TIMESTAMP_ISO8601} "
      negate => true
      what => previous
    }
  }
}

output {
  elasticsearch {
    hosts => ["127.0.0.1:9200"]
    index => "%{[@metadata][beat]}-%{+YYYY.MM.dd}"
    document_type => "%{[@metadata][type]}"
  }
}

filebeat.yml:

filebeat:
  prospectors:
    -
      paths:
        - /myapp/log/*.log
        - /myOtherApp/log/production.log
      input_type: log
  registry_file: /var/lib/filebeat/registry
output:
  logstash:
    hosts: ["elk-staging.infinitedisorder.com:5018"]
    tls:
      certificate_authorities: ["/etc/pki/tls/certs/elk-staging.crt"]
      certificate: "/etc/pki/tls/certs/elk-staging.crt"
      certificate_key: "/etc/pki/tls/private/elk-staging.key"
shipper:
logging:
  files:
logging:
  level: warning
  to_files: true
  to_syslog: false
  files:
    path: /var/log/filebeat
    name: filebeat.log
    keepfiles: 7

Automated install from ansible playbook:

---
- hosts: tag_Name_*hosts*
sudo: True
user: ubuntu
tasks:
- command: mkdir -p /etc/pki/tls/certs
- command: mkdir -p /etc/pki/tls/private
- copy: src=./elk-staging.crt dest=/etc/pki/tls/certs/elk-staging.crt
- copy: src=./elk-staging.key dest=/etc/pki/tls/private/elk-staging.key
- command: chmod 444 /etc/pki/tls/private/elk-staging.key
- shell: wget https://download.elastic.co/beats/filebeat/filebeat_1.0.0-rc2_amd64.deb
- shell: dpkg -i filebeat_1.0.0-rc2_amd64.deb
- copy: src=./filebeat.yml dest=/etc/filebeat/filebeat.yml
- shell: curl -XPUT 'http://elk-staging.infinitedisorder.com:9200/_template/filebeat?pretty' -d@/etc/filebeat/filebeat.template.json
- service: name=filebeat state=restarted

Don’t forget to install the logstash-input-filebeat plugin

DigitalOcean vs Linode

Since I use AWS at work, I wanted to try something else for my personal workstation (this is basically a tmux jumpbox for me).

Security: winner: neither?
The nice thing about both of these services is that they are very simple to use. Compared to EC2, they are lacking many features, the biggest surprise for me was the lack of network based security groups. Alternately, you can use a host-based firewall but good luck with any DOS attack. Another lacking feature is the ability to NOT have a public IP (at least this was lacking out of the box…I bet you can just ifdown that interface). Security seems to be an afterthought for these services, it’s important to at least switch from password to SSH keys, remove root login and add a firewall. Suggestions from digital ocean are pretty good: https://www.digitalocean.com/community/tutorials/7-security-measures-to-protect-your-servers

Pricing: winner: digital ocean if you want a $5 instance
Very similar, the main difference is that Digital Ocean has a $5/month instance for 512mb/20gb/1core. Both offer 1gb/30gb/1core for $10/month. Both use SSDs (yes!).

Instance Creation: winner: digital ocean
Digital Ocean uses a wizard style startup, so it was obvious what to do. Linode was not a wizard, but it was pretty easy to guess where to go next. Creating an instance and then loading an OS is a two-step process on linode, instead of one.

Capabilities: winner: not sure
It seems like linode has a few more features (more OS support). I didn’t investigate this too much. Both offer console access if you get locked out, although the linode console didn’t work for me.

Network Copy Speeds: winner: digital ocean
This was important to me, as I often shuffle things from place to place with SCP.
Speeds in Megabits-
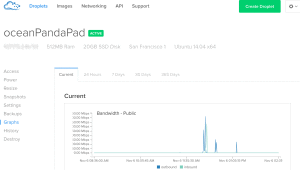
DigitalOcean:400mb UP :400mb DOWN
Linode:120mb UP: 320mb DOWN

GUI: winner: digital ocean
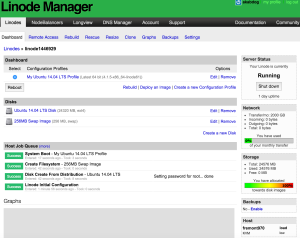
Digital Ocean won this hands down for beauty factor and simplicity.

DigitalOcean_Control_Panel1


DigitalOcean_Control_Panel2


linode

Update: I started getting seg faults with apt-get and noticed I was out of memory. It’s an easy fix to add some swap https://www.digitalocean.com/community/tutorials/how-to-add-swap-on-ubuntu-14-04 .
Disclaimer: I am not paid or affiliated with either of these companies.

Restore of mysqldump taken with –all-databases

This gotcha always gets me and when I google it I get nowhere.

Backup all databases:
BACKUP_FILE=`/mnt/backups/all_databases_`date -I`-`echo $RANDOM % 1000 | bc`.sql`
mysqldump -u root -h 127.0.0.1 --all-database > $BACKUP_FILE

Restore a specific database:
RESTORE_FILE=`ls -tr /mnt/backups/*.sql | tail -n 1`
mysql -u root -h 127.0.0.1
drop database db_name;
create database db_name;
exit
mysql -u root -h 127.0.0.1 db_name < $RESTORE_FILE

note: when restoring a database, you may need to use the same DB name as the original

Creating a ubuntu Opsworks AMI with an encrypted volume

Amazon says that drive encryption in Opsworks is on the roadmap. In the meantime they suggest creating a drive in EC2, adding it to resources, then mapping it to an instance.

For my automation, I much prefer to have an AMI with an encrypted volume attached:

1. created instance in opsworks, no application recipes
2. cleaned out opsworks data from instance http://docs.aws.amazon.com/opsworks/latest/userguide/workinginstances-custom-ami.html
3. created encrypted volume, mounted it elsewhere, created ext3 filesystem
4. added mount command to /etc/rc.local (mount /dev/xvdh /storage/)
5. shutdown opsworks instance via opsworks
6. created snapshot of 100gb volume
7. attached volume to instance and specify snapshot (snap-6ed57648)
8. created ami “encrypted-disks-ubu1204-4”
9. created new instance in scout layer and another new instance in a blank layer, both using new AMI
10. verified applicable volumes are encrypted
11. started instance in opsworks

Note: don’t forget, you can’t share encrypted volumes with other accounts, the encryption key is only accessible from your account.

A bETTER way to paste from a tmux remote console to osx

I finally came up with the way I always wanted this to work. Here is my workflow:

1. I run a command in a tmux pane to copy the entire buffer history of that pane.
2. Sublime Text pops open with the text from that buffer, I can edit the text and copy whatever I need to share with others.

=========================================
Prerequisites: have dropbox running on wherever tmux is running (yes dropbox does work without a gui).

1. First off, my tmux.conf:

bind-key p command-prompt -p ‘save to file:’ -I ‘~/Dropbox/tmux/tmux.history.txt’ ‘capture-pane -S -32768 ; save-buffer %1 ; delete-buffer’

2. Now let’s run a launchctl to monitor the folder and open it in sublime text. Change USERNAME to your username (I’ll fix that in 2.0).

vi ~/Library/LaunchAgents/tmux.plist

<?xml version=”1.0″ encoding=”UTF-8″?>
<!DOCTYPE plist PUBLIC “-//Apple Computer//DTD PLIST 1.0//EN”
“http://www.apple.com/DTDs/PropertyList-1.0.dtd”>
<plist version=”1.0″>
<dict>
<key>Label</key>
<string>FolderActions</string>
<key>ProgramArguments</key>
<array>
<string>/usr/bin/open</string>
<string>-a</string>
<string>Sublime Text</string>
<string>/Users/bsmith/Dropbox/tmux/tmux.history.txt</string>
</array>
<key>WatchPaths</key>
<array>
<string>/Users/bsmith/Dropbox/tmux</string>
</array>
</dict>
</plist>

3. launchctl load ~/Library/LaunchAgents/tmux.plist
4. Test it by launching tmux on your remote server, control-b -> p -> return
5. If everything went well, your sublime text should open with your tmux history automagically.
6. A nice trick to go to the bottom in sublime text command – <down arrow>

kibana4 startup script for debian

Kibana4 has some great new features but doesn’t include a startup script.

Here is my contribution, a simple startup script, tested on debian 7.

https://github.com/akabdog/scripts/blob/master/kibana4_init

Bash script for automated updates of xenServer

Without a license, xenCenter will tell you what updates are needed and point you to the webpages to download them.

If you download them all manually to a folder, you can use the below script to deploy them. It works on linux only (not osx). Some of the updates may fail if you don’t put your host in maintenance mode.

#!/bin/bash

#This script takes two arguements, the source folder of all the updates and the xenserver you want to patch
#e.g. xen_updater.sh ~/Downloads/xen_updates 172.20.10.74

if [ $# -eq 2 ]; then

source_directory=$1
destination_directory=/var/tmp/`date -I`
destination_host=$2

#first we unzip the files
for i in `ls $source_directory/*.zip`; do unzip -n -d $source_directory $i; done

#then we copy the files to the xenserver
echo "Files will be copied to $destination_host in the directory $destination_directory"
ssh root@$destination_host "mkdir -p $destination_directory"
scp $source_directory/*.xsupdate root@$destination_host:$destination_directory/

#time to apply the patches
patches=$(ssh root@$destination_host "ls $destination_directory/*.xsupdate")
echo "patches to be applied:"
echo "$patches"

for i in $patches; do
        uuid=$(ssh root@${destination_host} "/opt/xensource/bin/xe patch-upload file-name=${i} 2>&1 | grep uuid")
#       echo "$uuid"
        uuid_fixed=$(echo $uuid | awk '{print $2}')
#       echo "$uuid_fixed"
        echo "installing: $i uuid:$uuid_fixed"
        ssh root@$destination_host "/opt/xensource/bin/xe patch-pool-apply uuid=${uuid_fixed} 2>&1"
        echo "removing: $i to save space"
        ssh root@$destination_host "rm $i"
        done

else
        echo "This script takes two arguements, the source folder of all the updates and the xenserver you want to patch \n e.g. xen_updater.sh ~/Downloads/xen_updates 172.20.10.74"
fi

Setup of M3i Zero GMP-Z003

Because most of the sites discussing this are filled with broken links or mis-information, I decided to add my procedure here. You can download all the files in one zip from here:
http://the408.com/downloads/infiniteDisorder_NDS.zip
1. Grab a micro SD card and format it FAT.
2. Extract the file G6&M3DS-R_M74.zip, it will be a folder called SYSTEM. Copy this to the root directory of the SD card.
3. Extract the file F_CORE_v4.2.0.zip, it will be a file called F_CORE.DAT. Copy this to the root directory of the SD card.
4. Extract the file 3GUpdaterPlus_450HW.zip, it will be a file called 3GUpdaterPlus_450HW.nds. Copy this to the root directory of the SD card.
5. Plug the SD card into your m3i and plug your m3i into your computer by matching up the arrows on the plastic. Once the light stops blinking, its done.
6. Insert the m3i into your NDS, you should be able to boot the m3i and start the NDS emulator, then select 3GUpdaterPlus_450HW.nds to apply the update.
7. Now you can download and extract F_CORE_v4.5.0.zip, replace the existing F_CORE.DAT file and plug the m3i into your computer again, once it stops blinking, everything is up to date.
8. Plug the SD card into you computer one last time, create folders of any names you wish and add your ROMs.

Quick Deploy for vCenter 5 and Oracle 11.2

This is pretty easy once you know the right steps:
Download “instantclient-basic-windows.x64-11.2.0.3.0.zip” and “instantclient-odbc-windows.x64-11.2.0.3.0.zip”
From http://www.oracle.com/technetwork/topics/winx64soft-089540.html
Extract both files to C:\Oracle (choose merge when prompted)
Run C:\Oracle\instantclient_11_2\odbc_install.exe
Create window environmental variable ORACLE_HOME=C:\Oracle\instantclient_11_2\
Create C:\Oracle\instantclient_11_2\NETWORK\ADMIN\tnsnames.ora
Open control-panel -> administrator tools -> Data Sources -> System DSN -> Add -> Oracle

Now install vCenter, when prompted choose your new data source.

Once your done, shutdown the vCenter Managment Web Services
copy ojdbc5.jar to ojdbc5.jar.orig in C:\program files\VMWare\infrastructure\tomcat\lib
copy c:\Oracle\instantclient_11_2\ojdbc5.jar to  C:\program files\VMWare\infrastructure\tomcat\lib
Start vCenter Managment Web Services

using GPG to send an encrypted message

These steps will allow you to send a message to a user. Only that user will be able to decrypt it.
First acquire the users public key and create a text file with it.
vi userName.pub
gpg --import userName.pub
gpg --list-keys

Now create a text file with your message and encrypt it
vi lab_creds.txt
gpg -se -a -r name@domain.com lab_creds.txt

enter your private key password
Now a file will be created called lab_creds.txt.asc, paste that into an email.

embedding html 5 videos for universal consumption

This is surprisingly easy.
Throw your video into handbrake. I usually select ipod template, the video will end up 320 x 176.
Once that is done, covert the video using
ffmpeg2theora videoName.m4v videoName.ogg
Check the video size by getting info in finder. Now you are ready to upload the videos and embed it using:
<div id="_mcePaste">&lt;video width="320" height="176" controls&gt;</div>
<div id="_mcePaste">&lt;source src="videoName.m4v" type='video/mp4; codecs="avc1.42E01E, mp4a.40.2"'&gt;</div>
<div id="_mcePaste">&lt;source src="videoName.ogv" type='video/ogg; codecs="theora, vorbis"'&gt;</div>
<div id="_mcePaste">&lt;/video&gt;</div>

extend full partitions on aix

By default AIX installs on several very small partitions, they fill up fast.

The good news is, they are easy to extend and no reboot or install media is required. Just use this to see what you have available:
# lspv hdisk0
# lspv hdisk1

Find out which partitions are full using:
# df -k
Filesystem    1024-blocks      Free %Used    Iused %Iused Mounted on
/dev/hd4           540672    0   100%     1622     1% /
/dev/hd2          2179072   0   100%    29351     6% /usr
/dev/hd9var        540672    0    100%      379     1% /var
/dev/hd3            32768     17188   48%       84     2% /tmp
/dev/hd1            16384     15820    4%       18     1% /home
/proc                   -         -    -         -     -  /proc
/dev/hd10opt        65536     11160   83%      856     6% /opt

Extend the partitions using:
# chfs -a size=1000M /dev/hd2 - Sets the size to 1000MB
# chfs -a size=+1G /dev/hd2 - Adds 1Gb to /dev/hd2
# chfs -a size=-1G /dev/hd2 - Removes 1Gb from /dev/hd2

Or set the partition size to a particular size (you can only increase sizes, not reduce):
# chfs -a size=500M /dev/hd4
# chfs -a size=1000M /dev/hd2
# chfs -a size=1000M /dev/hd9var
# chfs -a size=100M /dev/hd3
# chfs -a size=100M /dev/hd1
# chfs -a size=100M /dev/hd10opt

allow root ssh login solaris 11 express

vi /etc/ssh/sshd_config
PermitRootLogin = yes

vi /etc/default/login
#CONSOLE =/dev/login

rolemod -K type=normal root

iscsi ubuntu quick config

#apt-get install iscsitarget
#vi /etc/default/iscsitarget
SCSITARGET_ENABLE=true
#vgcreate iscsi /dev/sda
#lvcreate -L1500G -n jarfis_colder iscsi
#lvcreate -L1260G -n jarfis_warmer iscsi
#vi /etc/ietd.conf
Target iqn.2010-10.com.qualys.qa.vuln:jarfis.lun000
Lun 0 Path=/dev/iscsi/jarfis_colder,Type=blockio,ScsiSN=JARFIS-LUN000
Alias LUN000
Target iqn.2010-10.com.qualys.qa.vuln:jarfis.lun001
Lun 1 Path=/dev/iscsi/jarfis_warmer,Type=blockio,ScsiSN=JARFIS-LUN001
Alias LUN001
#/etc/init.d/iscsitarget restart